Full AWS WordPress Blog series so far:
This is the second article in a series which will detail how to deploy a WordPress server at AWS the cheapest way possible. This series will teach you about Route53, EC2, S3, CloudFront, IAM, and more! All while helping you setup your own blog which every good IT professional should have.
This article will detail how to deploy the EC2 server and it’s IAM role.
Deploy the IAM role
An IAM role is required to give the EC2 server the permissions it needs to interact with other AWS services. These steps are how to create the role by hand, later on a CloudFormation template will be linked which deploys the IAM role for you.
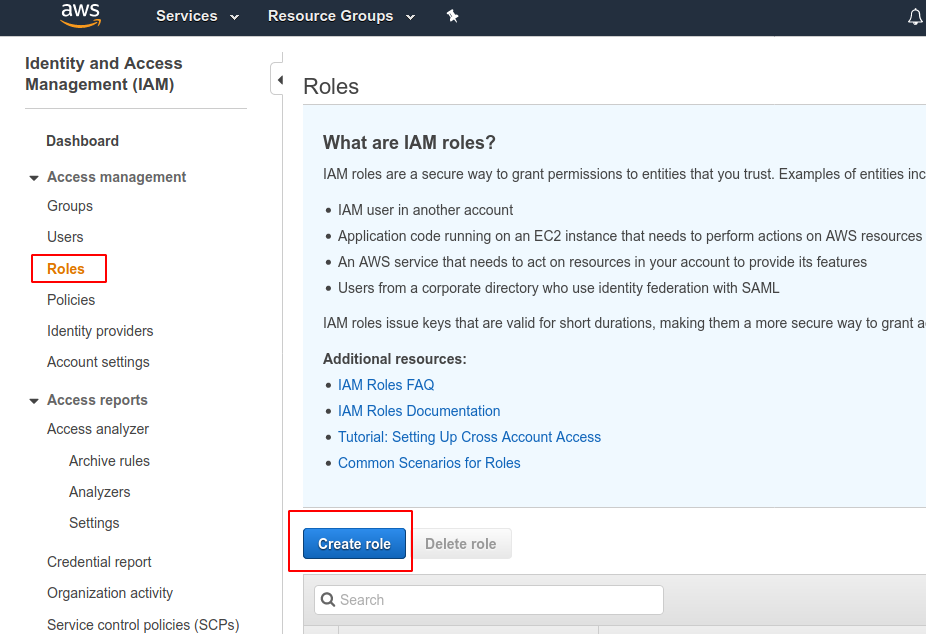
- Navigate to IAM in the console
- Click on Roles (it is in the left hand nav bar)
- Click Create Role
- Common use cases: Select EC2
- Click Next: Permissions
- Search for and add the following
- CloudWatchAgentServerPolicy
- AmazonSSMManagedInstanceCore
- Click Next: Tags
- Click Next: Review
- Role name: Wordpress-Blog-MySiteName-Role
- Click Create Role
- Navigate to your newly created role
- Click Add inline policy
- Select the JSON tab
- Paste in the IAM policy below
- Click Review policy
- Name: SMM-ParameterStore-Site.Name-ReadWrite
- Click Add inline policy
{
    "Version": "2012-10-17",
    "Statement": [
        {
            "Sid": "BlogParameterStorePerms",
            "Effect": "Allow",
            "Action": [
                "ssm:PutParameter",
                "ssm:GetParameter",
                "ssm:AddTagsToResource"
            ],
            "Resource": [
                "arn:aws:ssm:::parameter/*"
            ]
        }
    ]
}
Deploy the EC2 Server
For this Wordpress server we will use a t3a.
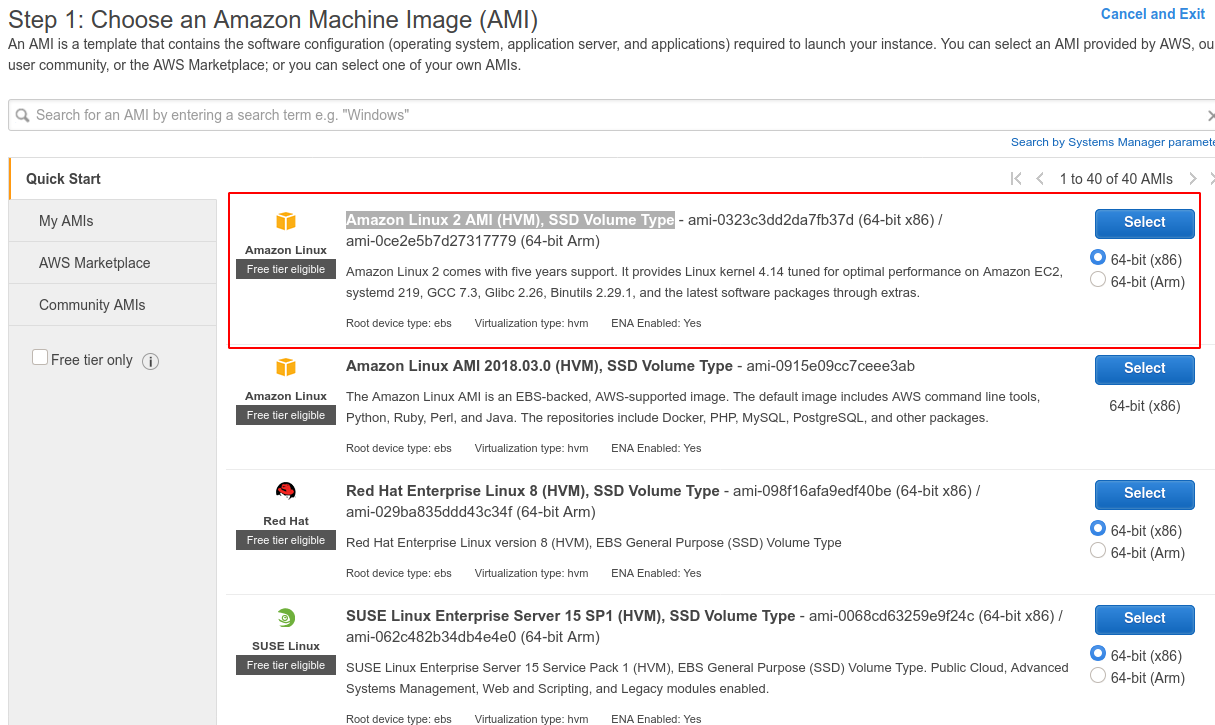
- Navigate to EC2 and click Launch instance
- Select the Amazon Linux 2 AMI (HVM), SSD Volume Type
- For instance size:
- If this is a new account and you haven’t used your 1 years of free tier yet pick t2.micro
- Otherwise pick t3a.micro, this will give you the most for your money.
- A t3a.nano will work for a small practice blog but in my experience it needs very frequent reboots
- Click Next: Configure Instance Details
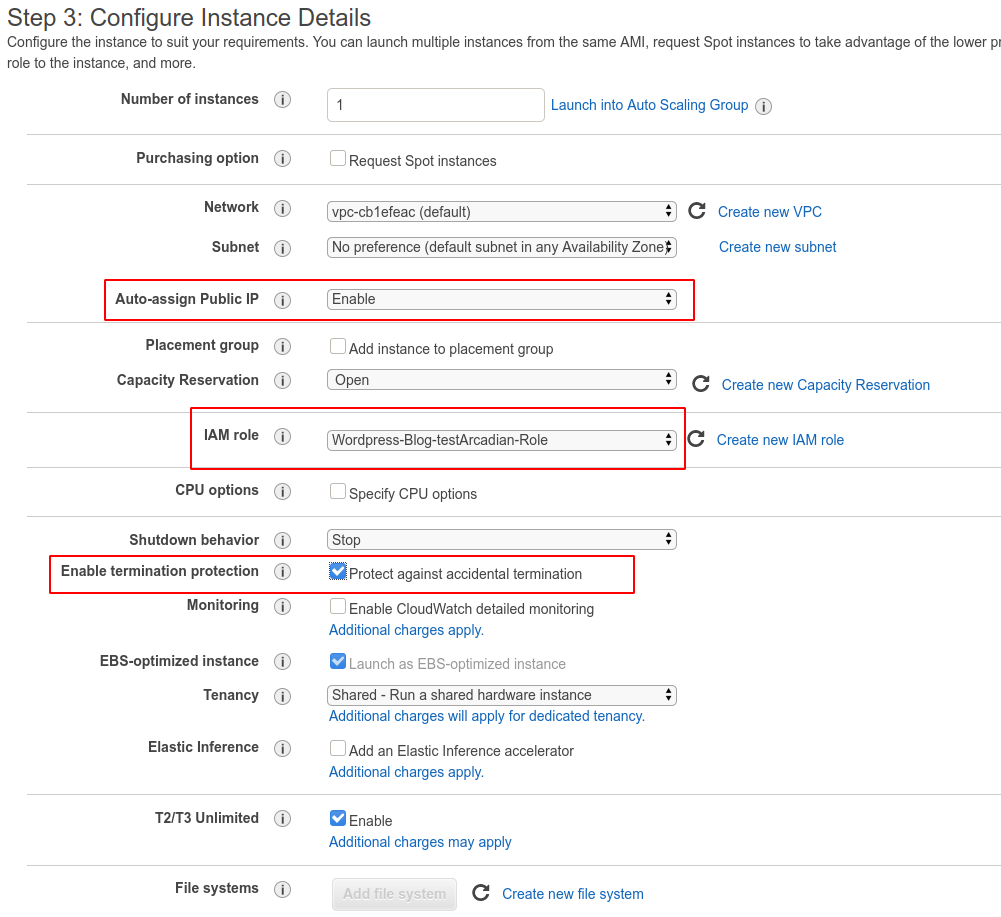
- Auto-assign Public IP: Enable
- IAM role: Choose the one you created earlier
- Enable termination protection: Check this
- Click Next: Add Storage
- 30 GB should be sufficient but set as you see fit
- Click Next: Add Tags
- Always try to add tags to everything in AWS. These help immensly when looking around in the billing panel
- Click Next: Configure Security Group
- Create a new security group
- Security group name: Wordpress-Server
- Port 22
- Source: My IP
- It is important to lock this port down just to your IP.
- Hackers will constantly attempt to access your server over port 22. This is a security risk to leave open and also puts unneeded load on your tiny server
- Port 80
- Source: Anywhere
- Port 443
- Source: Anywhere
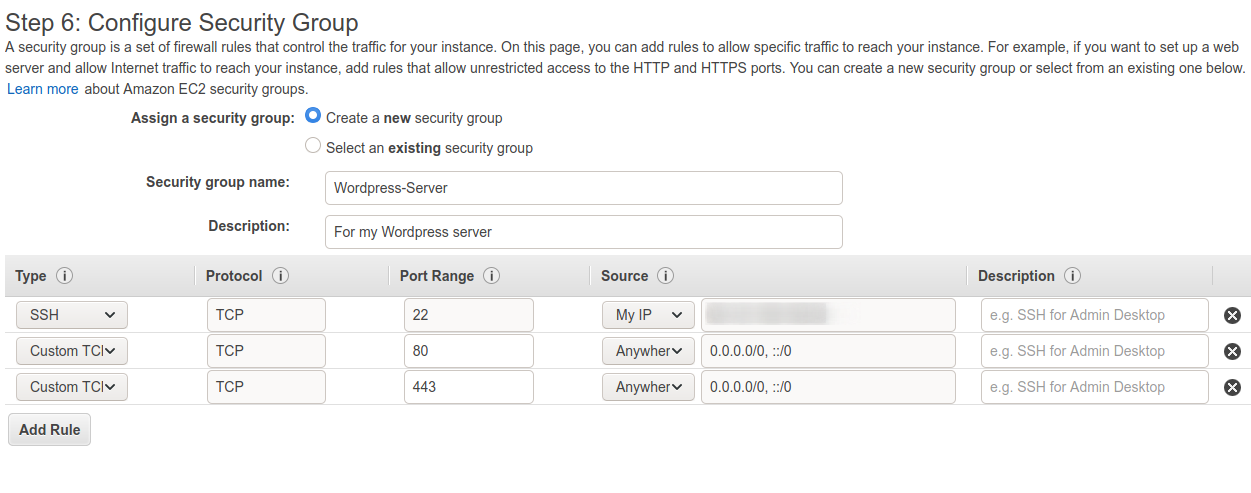
- Source: Anywhere
- Click Review and Launch
- Click Launch
- Create a new key pair
- Make sure to store this securely and back it up.
- This is how you sign into your server, don’t let it leak and don’t lose it.
- Launch the instance
Connect up to the EC2 Instance
Once the EC2 instance is deployed you can connect up.
- Select the instance
- Click Connect
- Follow the instructions give by AWS
- If you are on windows:
- Using Putty will be the quickest way to connect up
- A better option is to install Ubuntu on Windows and use the terminal provided through that
- If you are on windows:
Your EC2 instance server is now up and ready to have WordPress deployed onto it. The next article will container a script for easy WordPress installation.